Are you ready to get out of your comfort zone and create stunning outdoor photography in the USA? Step away from the postcard views, and explore the countryside for hidden gems. Whether you’re a beginner looking to take amateur photos or an experienced pro photographer hunting for those jaw-dropping shots, there are so many incredible landscapes across our nation waiting to be captured behind your lens! From mountain tops in Colorado, dunes in Utah, riverbeds in Georgia, and more—you’ll discover some of the most prolific and awe-inspiring panoramas that America has to offer. So open up your camera bag and let’s go on an amazing adventure with this guide on how to capture incredible outdoor photography in the USA!
Choose the right time of day to get the best lighting for your photography
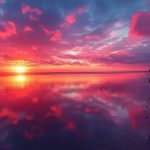
The quality of light can make or break a photo, which is why you need to take the time to figure out when and where the best light will be. For outdoor photography, early morning and late afternoon are usually your best bets for capturing that beautiful golden-hour lighting. During these times, the sun illuminates landscapes more subtly—creating dreamy shadows, textures, and tones across the land.
Find an interesting point of view to capture a unique photo
Get off the beaten path! Get creative with your angles and look for different perspectives that will make your shot stand out from the rest. Don’t just settle for an average landscape view—look for ways to move around and find unique vantage points. Consider getting up high or down low to explore different perspectives, and use natural frames in the environment for added depth to your photos.
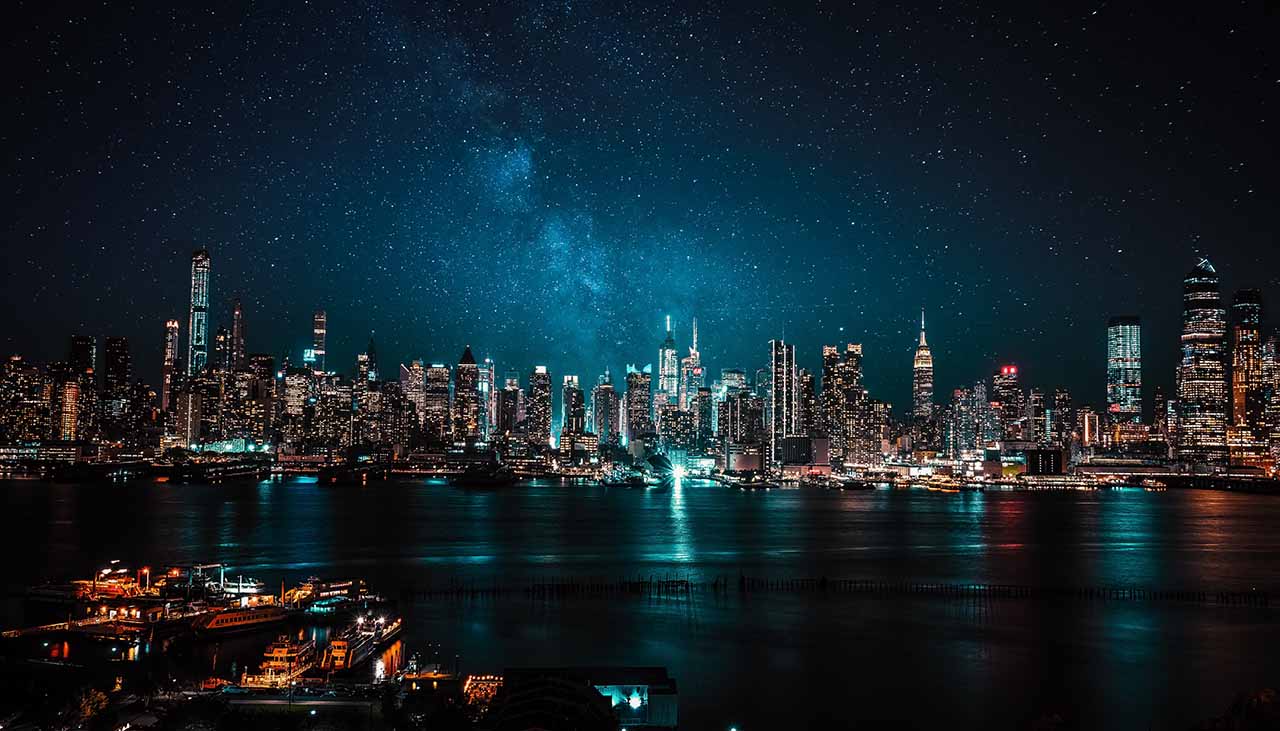
Use a tripod for stability and sharper shots
Using a tripod can help you get sharper images with less blur and camera shake, which is especially important when doing long exposures— shooting at night or creating motion blur shots. It also allows you to take more time composing an image without having to worry about holding the camera steady. If you’re looking for extra stability, consider using a shutter release cable as well!
Make use of natural frames in the environment for added depth to your photos
One way to add dimension and interest to your outdoor photography is by making use of natural frames in the environment. This could be anything from a window or doorway, branches, mountainsides, buildings, etc. Having something like this to frame your image can help draw viewers in and create a sense of depth in your photos.
Consider getting up high or down low to find different perspectives
In addition to using natural frames for depth, you can also try playing around with different angles by getting up high or down low. Climbing up a mountain—or even just a small hill—can give you an overview of the land below and allow you to capture landscapes from unique perspectives that may otherwise have been overlooked or unseen. On the other hand, going down low allows for interesting foreground elements like rocks, trees, or plants that can add a dynamic pop to your photos.
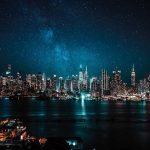
Get creative with long exposure shots to create movement and blur effects in your photos
Long exposures offer a whole new realm of possibilities when it comes to outdoor photography! You can experiment with different shutter speeds and motion blur techniques to get some stunning shots. Think swirling waterfalls, dreamy skies, or star trails across the night sky—all of which are achievable with a little bit of creativity and the right gear.
So now you know how to capture incredible outdoor photography in the USA! From choosing the perfect time of day for lighting, finding unique viewpoints, using a tripod, framing shots with natural elements, playing around with angles, and utilizing long exposures—you now have the tools to bring your photos to life! Go out and explore the great outdoors and get ready to take some amazing shots.
Utilize different shutter speeds to create more interesting effects
Shutter speed is also an important element of outdoor photography. It can be used to capture motion, blur, or freeze-frame a particular moment in time. A slower shutter speed allows for longer exposures which can result in blurred movement or trails of light in the sky, while faster shutter speeds allow you to freeze a fleeting moment like the splash of a waterfall or the wings flapping on a bird. Experiment with different shutter speeds and learn how they affect your photos’ look and feel!
Adjusting other settings will further improve the quality of your shots
In addition to adjusting your shutter speed, you may want to play around with other camera settings such as ISO, aperture, and white balance. These settings can help you achieve the desired look in your photos and ensure that they come out looking their best. With a bit of experimentation, you’ll quickly learn which camera settings work best for different types of shots—so don’t be afraid to experiment!
Don’t underestimate the impact of good lighting
Lighting is key when it comes to outdoor photography. Depending on the time of day or weather conditions, you may need to adjust your settings accordingly to get the perfect shot. Look for areas with filtered light (such as under trees or a bridge) or wait for golden hour when possible — this is typically around sunrise or sunset and will create stunning warm tones in your photos.
Have fun, and remember to keep safety in mind!
Most importantly: have fun and stay safe out there! While the outdoors can offer a lot of opportunities for amazing photos, be sure to take measures to ensure your safety. This includes researching potential areas before you visit them, wearing appropriate clothing and shoes, letting someone know where you’ll be, and following any safety guidelines posted in the area.
Happy shooting! Now go out and explore the great outdoors and get ready to take some amazing shots.